Potatoes are a staple in our diets, symbolizing resilience and versatility. Learning how to grow potatoes at home opens up a world of possibilities: from creamy mashed potatoes to crispy fries, you can enjoy the fruits of your labour in countless delicious ways.
Homegrown potatoes offer numerous benefits: they’re cost-effective, environmentally friendly, and can be harvested in various ways depending on your space and gardening style. From traditional rows to innovative container gardening techniques, multiple methods exist to cultivate these tubers successfully.
How To Grow Potatoes In A Container
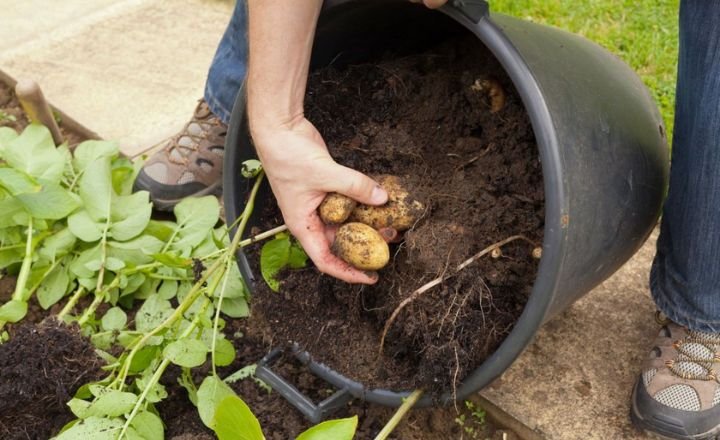
Container gardening offers novice and seasoned gardeners a unique opportunity to grow potatoes without needing traditional garden space. The most compelling advantage is the ability to control soil quality, moisture, and pests effectively.
- Container growing allows you to position your plants in locations that receive optimal sunlight while minimizing the risk of soil-borne diseases.
- When preparing your container for planting, it is crucial to choose a size at least 8-9 inches deep since potatoes develop underground tubers that require room to grow.
- Combining high-quality potting soil with organic compost will promote healthy growth and nutrient uptake while ensuring optimal drainage.
- As you plant, bury seed potatoes about 4-6 inches deep in the soil mix to encourage strong root development.
Throughout their growing cycle, provide consistent watering while avoiding waterlogging, a balancing act that ensures your tubers remain plump without rot. With proper care and maintenance, like monitoring for pests and adding mulch, you’ll nurture vibrant potato plants thriving right on your balcony or patio.
How To Grow Potatoes At Home Without Seeds
Growing potatoes at home without traditional seeds is a rewarding task that allows you to recycle edible potatoes into a thriving crop. Start by selecting healthy, mature potatoes with visible “eyes,” as these are the buds from which new growth will emerge.

- Aim for blemish-free medium-sized tubers that are firm and have not sprouted extensively; this guarantees robust plant health.
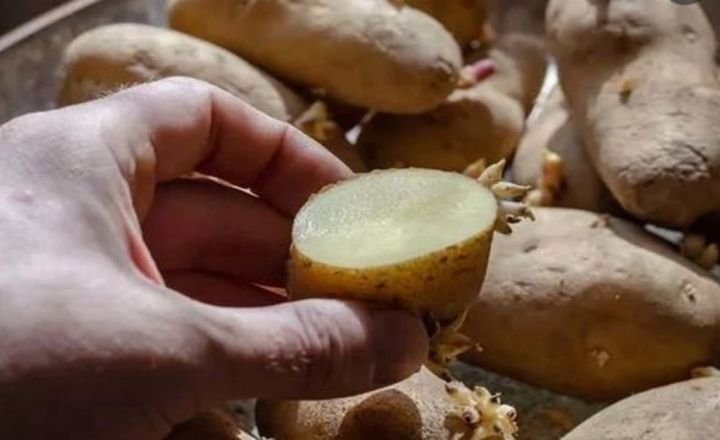
- Once you’ve selected your potatoes, prepare them by cutting them into chunks, ensuring each piece has at least one eye.
- Allow the cut surfaces to dry and callous over for about 24 hours to prevent rot once planted.
- When planting, choose loose, well-drained soil enriched with organic matter; this ensures your potato plants have the nutrients they need to thrive.
- Dig trenches about 4-6 inches deep and place your potato pieces spaced approximately 12 inches apart before lightly covering them with soil.
Come, gardeners, find success in planting deeper than recommended, up to 8 inches, as this can yield larger tubers beneath the surface while keeping them insulated against fluctuations in temperature above ground.
How To Grow Potatoes In The Ground
To successfully grow potatoes using the traditional method, start with meticulous soil preparation. Ideally, choose a location that receives at least six hours of sunlight daily and has well-draining, loamy soil enriched with organic matter like compost or aged manure.
- Aim for a pH balance between 5.8 and 6.5 to create optimal conditions for your tubers.
- When planting, bury seed potatoes approximately 3 to 4 inches deep, ensuring there’s adequate room for them to expand without crowding.
- Spacing is crucial; place your seed potatoes about 12 inches apart in rows spaced around 2-3 feet apart to promote airflow and ease of maintenance.
- As they sprout water consistently but avoid waterlogging, potatoes thrive best with about an inch of moisture each week.
To maximize yield while controlling common pests like aphids or Colorado potato beetles, consider crop rotation or companion planting with herbs such as basil that naturally deter these nuisances.
How To Grow Potatoes In A Bag
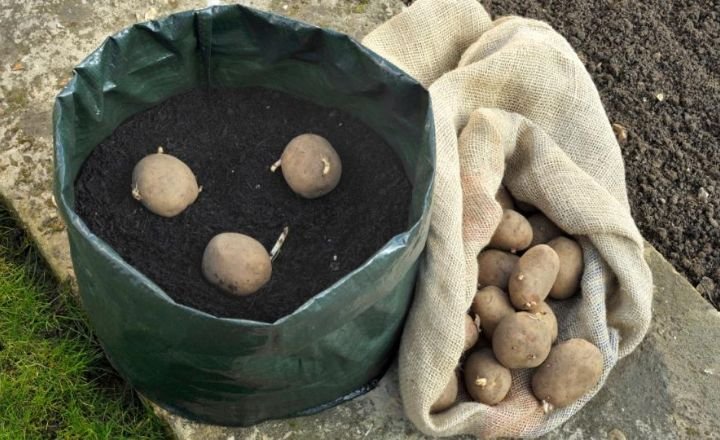
Growing potatoes in a bag is a practical solution for limited garden space and adds a unique twist to your gardening enthusiasm. Selecting the right bag- preferably made from breathable materials like fabric or burlap- allows for proper aeration and drainage, essential elements that prevent root rot.
When filling the bag, consider creating a balanced soil mix of compost, peat moss, and perlite to ensure your potatoes receive ample nutrients and promote healthy growth. Planting depth can be somewhat flexible; aim for about 4 inches deep when laying out your seed potatoes at the bottom of the bag.

They grow and sprout, continue adding more soil as necessary, a technique known as hilling, to encourage even more tuber development along the buried stems. Regular watering is crucial during active growth phases; keep an eye on moisture levels since bags can dry out faster than traditional beds.
How To Grow Potatoes In Water
Growing potatoes in water offers a fascinating, hands-on way to understand plant biology while enjoying bountiful harvests. This method begins with selecting sturdy seed potatoes that are disease-free and firmly sprouted.
- Planting them in soil, you’d partially submerge these tubers in a water container, ensuring that only the bottom half is submerged while the upper halves remain exposed to air.
- Using toothpicks to balance the potatoes on the rim of your container can enhance stability, allowing roots to emerge into the water below.
As your potato plants develop, they rely solely on nutrient-rich water for sustenance. Add organic fertilizers or liquid nutrients periodically to ensure robust growth and enhance flavour and health.
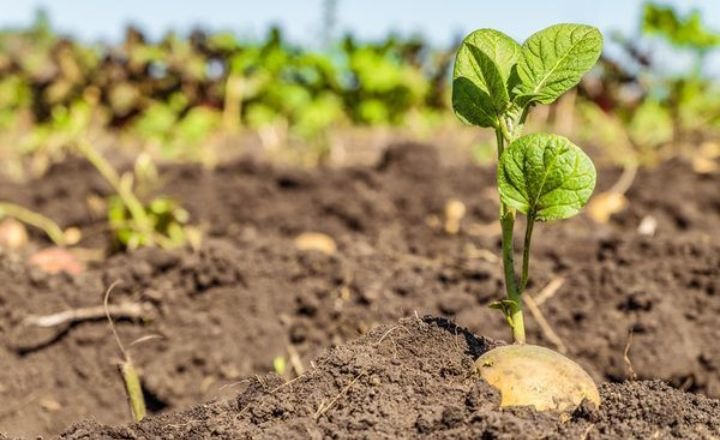
You’ll quickly witness the wondrous transformation as vibrant green shoots push above the surface and roots develop beneath.
How To Start Potatoes In Water From Potato Cuttings
Starting potatoes in water from cuttings is a fascinating and resourceful way to cultivate these hardy tubers, offering both visual appeal and practical benefits. To begin your journey, select healthy seed potatoes with at least one or two “eyes,” the slight indentations where sprouts emerge.

- Cut them into chunks, ensuring each piece includes an eye, and let the cut surfaces dry for a few hours; this helps prevent rot during propagation.
- Fill a glass container or jar with clean water and gently submerge the potato pieces.
- An innovative tip is to use toothpicks to suspend the potato above the waterline if you need support.
- This enhances airflow and allows you to observe root development.
Place your setup in a warm location with indirect sunlight; within days, you’ll notice promising white roots beginning to sprout from the eyes. Change the water regularly every few days to maintain freshness and create an optimal environment for growth.
Maintaining Water Levels And Preventing Rot
Select healthy tubers with at least one eye per piece to ensure your potato cuttings thrive. Submerge the bottom half of each cutting in a glass of water, ensuring the eyes are not submerged entirely; they need air exposure to sprout efficiently.
The key here is maintaining an optimal water level: it should always cover the lower part of the cutting without drowning the vital growth points.
Rot can be a significant concern in this method, so change the water every few days to keep it fresh and oxygenated. This practice prevents stagnant conditions where bacteria can flourish and ensures that your potato cuttings receive adequate nutrients as they develop roots.
Transitioning Water-Grown Potatoes To Soil
When planting your water-grown potatoes in soil, consider using loose, well-draining earth enriched with organic matter. This encourages robust root development while preventing rot a common mistake for novice gardeners.
Experimenting with companion planting can dramatically enhance growth quality; pairing your potatoes with crops that naturally deter pests or improve soil health can lead to an abundant harvest. Don’t be afraid to try different varieties; some types adapt better than others in traditional garden settings.
Secrets To Growing Potatoes
To maximize your potato yield, consider staggered planting and variety diversity. By planting a mix of early and late maturing types, you can enjoy fresh potatoes throughout the season, ensuring that pests or diseases affect only part of your crop.
- Another insider tip is to enrich the soil with compost or well-rotted manure before planting.
- This boosts nutrient levels and improves moisture retention, which potatoes love.
- Containers offer unique advantages like mobility and controlled conditions.
- Opt for a blend of potting soil and garden loam for extra drainage while ensuring your containers have adequate holes at the bottom.

- If you’re using bags, select biodegradable options that break down over time; this allows earthworms access and improves soil structure as the bag decomposes.
- The best time to harvest is when foliage begins to yellow and die back. Waiting an additional week can intensify flavour by allowing starches to develop fully.
- Common mistakes often stem from either overcrowding plants or skimping on water.
Potatoes need consistent moisture without waterlogging their roots. Monitoring weather forecasts will help you dodge issues caused by unexpected droughts or heavy rains during critical growth phases, ensuring you achieve tubers plump enough for size without compromising flavour.
Why You Should Grow Potatoes in 2025
Self-sufficiency: Take charge of what you eat. Say goodbye to pesticides and preservatives, just pure, natural goodness.
Adaptable: Potatoes can flourish in containers, raised beds, or right in the ground.
Affordable: Just a handful of seed potatoes can produce a bounty of fresh veggies.
Family-Friendly: It’s simple enough for newcomers, and kids will have a blast getting involved!
Choosing the Best Potato Variety (USA & UK Friendly)
Top Varieties to Try in 2025
Yukon Gold (USA): Creamy and buttery, perfect for mashing or roasting.
Charlotte (UK): A delightful salad potato known for its smooth texture and fantastic flavor.
Red Pontiac (Both): Simple to cultivate, with a bright color and a rich, earthy taste.
Maris Piper (UK): The go-to choice for making chips or fries, a favorite in British kitchens.
When it comes to planting, always opt for certified seed potatoes, and if you can, go for organic ones. Steer clear of those store-bought eating potatoes since they usually have sprout inhibitors that can hinder your growth.
Conclusion
Growing potatoes at home can be a rewarding and enjoyable experience. Numerous methods are available to suit every gardener’s preference and space availability.
Plant them in traditional rows, utilize containers, or experiment with innovative techniques like vertical gardening or the “taters in straw” method; the possibilities are endless.
With just a bit of attention and care, you’ll uncover the secrets to producing delicious, homegrown potatoes that elevate your meals.
FAQs
How to sprout potatoes?
To encourage sprouting, place the potatoes in a warm, light location for about 1-2 weeks. A temperature around 60-70°F (15-21°C) works best.
What is the period for potatoes?
In many western regions, where the growing season is more extended and favourable, potatoes have a crop duration of about 100 to 120 days.
Can I grow potatoes indoors?
Absolutely! Just grab a deep grow bag and place it by a sunny window or set it up under some grow lights.
How many potatoes do you get from one plant?
Typically, you can expect around 5 to 10 potatoes per plant, but it really depends on the variety and how well you take care of them.
What’s the fastest-growing potato variety?
The ‘Rocket’ and ‘Swift’ varieties are your best bets for an early harvest, maturing in about 60 to 70 days.
